 |
| Our flier will entice you to attend! (Credit to Rafe for the painting we used as a background for the flier.) |
Monday, October 24, 2011
Work Party- November 12th!

Monday, October 3, 2011
Preparing the flat roof
 |
| Jesse is hard at work, putting final touches on the plywood decking |
 |
| Our friend Richard has come out a few Saturdays to help with the last of the exterior framing |
 |
| Jesse measuring to fit plywood around the base of a column |
 |
| Photo of scupper rough openning, showing 1/2" plywood perimeter and 1/8" plywood in the scupper itself. |
Monday, July 18, 2011
More Siding Pictures

Today, a few more pictures of the new siding. Here, Miles shows off the finished North Face of the House. Miles took advantage of our "Win A Free Trip to Austin" offer- and you should, too!

Miles getting up to the top of the scaffolding on the finished West face of the house. Look at them pretty lines! The color you see on the siding is just the primer which they put on hardie board for this climate, we think we're ultimately going to paint the exterior a slightly greyish, light blue.

Jesse admires the North side of the Master bedroom. We took a lot of care to get the lines of the siding to coincide neatly with the bottoms and tops of windows.

Jesse working on the scaffolding in the hot Texas sun. It's been over 100 degrees almost every day, so we've been starting a little after 7 and working until 3pm.

Taking a break high up on the West side.
Sunday, July 17, 2011
Siding
Hope you enjoyed the windows! So now onto the siding. But first a joke...Why did the chicken cross the road?..you'll have to read on for the answer.
We're using Hardie board planks for the majority of siding on our home. The trim will be galvanized metal throughout. We had the same company that made our roofing material make up some J molding for the trim. Details to follow. In some places we'll use reclaimed cedar fence boards. In a fantastic turn of events we've found a material and a solution to the translucent wall!! I can't tell you all how excited I am to have found a way to accomplish the design that we want. More on that when we get to the installation.
 My nephew, Miles came down at the beginning of July to help us out with the siding. Brave man to come to TX in the summer to learn some construction! The hardie looks yellow b/c it's pre-primed but we're thinking of going with a color called Florida Keys blue.

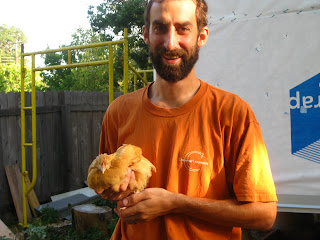 A little chicken wandered into the yard the other day and found some new friends. Her wing was a little hurt. We introduced her to the cats, decided Mj Tom wasn't the best chicken sitter and put her in a box with some mud, food and water. Much to Jesse's shigrin, I put up some signs for a lost chicken . The next day she looked rough so Jesse brought her to the pound for more attention. That afternoon we received a phone call from a neighbor looking for their chicken. So we passed on the pound info and said a little prayer for their reunion.
She was our first chicken visitor but not our last. We hope to have some chickens join our crew in the near future!
We're using Hardie board planks for the majority of siding on our home. The trim will be galvanized metal throughout. We had the same company that made our roofing material make up some J molding for the trim. Details to follow. In some places we'll use reclaimed cedar fence boards. In a fantastic turn of events we've found a material and a solution to the translucent wall!! I can't tell you all how excited I am to have found a way to accomplish the design that we want. More on that when we get to the installation.
 My nephew, Miles came down at the beginning of July to help us out with the siding. Brave man to come to TX in the summer to learn some construction! The hardie looks yellow b/c it's pre-primed but we're thinking of going with a color called Florida Keys blue.
 We went a looked at a house off of South Congress that has some really great details that we'd like to incorporate into our exterior. One of those was to have the seams of the siding land at the tops and bottoms of the windows. This is a great idea and looks fabulous unfortunately we decided on it after placing all the windows. So Jesse hit the excel sheet and I hit the ACAD and together we came up with a crazy pattern that works with 95% of the windows and looks like we had imagined.
Jesse and Miles have been amazing at implementing this pattern. Note the cheat sheet taped to the window with all the measurements for each course. 
This is a view looking down the west facade at the J-molding where it passes the cedar trim that will boarder the fence boards at the laundry space.
Why did the chicken cross the road?! To get to the job site, of course!
 A little chicken wandered into the yard the other day and found some new friends. Her wing was a little hurt. We introduced her to the cats, decided Mj Tom wasn't the best chicken sitter and put her in a box with some mud, food and water. Much to Jesse's shigrin, I put up some signs for a lost chicken . The next day she looked rough so Jesse brought her to the pound for more attention. That afternoon we received a phone call from a neighbor looking for their chicken. So we passed on the pound info and said a little prayer for their reunion.
She was our first chicken visitor but not our last. We hope to have some chickens join our crew in the near future!
Windows
We've greatly neglected our blog duties, so sorry. We knew it had been a long time but then we realised it had been THREE Months! Unacceptable. So to make up for the neglect I'm going to do a couple of posts all at once and beg for your forgiveness.
 So In this post we're gonna do an in depth look at our window installation. Hope you enjoy!
We're going to begin with a rough opening for a window that has the house wrap (white and blue paper to protect the house from water) in place and the first pieces of flexible window flashing (silver tape to really make sure no water gets in)
As you can see in the photo above and below Jesse has run a piece of flexible window flashing along the length of the window sill and a couple inches up either side on the exterior.

The next step is to weather proof the intersection of the sill and the jamb (the space left exposed in the pict above)

Jesse takes a piece about 5 inches long and bends it into the corner
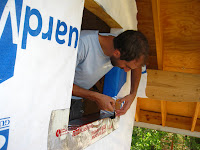

he does this on both sides making sure the tape wraps to the exterior and interior as well as up the jamb and along the sill


Removing just as much of the backing paper as he needs to so the rest doesn't stick until he's got it where he wants it.
 Then he take both legs of the other half and secures one half long the jamb to the exterior and the other half along the sill to the exterior.

Quick update: Chris and Jesse finished the roof and it looks great!
So In this post we're gonna do an in depth look at our window installation. Hope you enjoy! 
We're going to begin with a rough opening for a window that has the house wrap (white and blue paper to protect the house from water) in place and the first pieces of flexible window flashing (silver tape to really make sure no water gets in)
As you can see in the photo above and below Jesse has run a piece of flexible window flashing along the length of the window sill and a couple inches up either side on the exterior.

The next step is to weather proof the intersection of the sill and the jamb (the space left exposed in the pict above)

Jesse takes a piece about 5 inches long and bends it into the corner


he does this on both sides making sure the tape wraps to the exterior and interior as well as up the jamb and along the sill

Next he takes a wider piece of flashing and makes a slit half way down the center

This part is a little tricky to explain. He takes the piece and lays the uncut half in the middle of the jamb and sill.

Removing just as much of the backing paper as he needs to so the rest doesn't stick until he's got it where he wants it.
Then he take both legs of the other half and secures one half long the jamb to the exterior and the other half along the sill to the exterior.
Jesse then cuts the house wrap around the top of the window and tacks it up while we place the window.

Trinity gets the shims (slanted pieces of wood or plastic used to level all sorts of things) Once we've put the shims in place we put the window in and checked it a lot of times with various levels. Then we checked the diagonals to make sure the window wasn't skewed. Finally when it's perfect Jesse put in one screw on the window flange and we checked to make sure the window opened properly. Sorry no free hands for picts.


Once Jesse has put in all the screws into the predrilled holes he begins taping the sides where the flanges meet the house wrap.

Then he lets down the house wrap at the top, adds a little house wrap tape to the top of the window and we're done!!

Tuesday, April 26, 2011
Just a little vent about materials
As you know we're trying to make sure our house gets a 5 star rating from Austin Energy's Green Builiding program. It's sort of the Austin specific LEED. Well in order to be rated you have to have products that fits the guidelines and are energy efficient. This is great and right in line with our personal and professional design goals. The problem is we're on a tight budget and trying to use alternative materials. In most cases the material will meet the requirements but is not rated by a valid third party and so is not acceptable for the AEGB rating.
Specifically we've designed a covered east facing wall to be clad with translucent plastic panels. It has been so difficult to find a manufacturer that meets our criteria. I finally found a product, Kalwal, that would work perfect for our project but the price is exubernant because it's used on commercial projects. So it's back to the drawing board to either keep looking for a material that works or redesign the area to use a more traditional material. You would think there would have to be something! If any of you are entrepreneurs you should get in on this underserved market ASAP.
If anyone knows of an affordable product that offers translucent panels with a U-value of <.35 and a SHGC<.30 that is NFRC rated please let us know.
Specifically we've designed a covered east facing wall to be clad with translucent plastic panels. It has been so difficult to find a manufacturer that meets our criteria. I finally found a product, Kalwal, that would work perfect for our project but the price is exubernant because it's used on commercial projects. So it's back to the drawing board to either keep looking for a material that works or redesign the area to use a more traditional material. You would think there would have to be something! If any of you are entrepreneurs you should get in on this underserved market ASAP.
If anyone knows of an affordable product that offers translucent panels with a U-value of <.35 and a SHGC<.30 that is NFRC rated please let us know.
Thursday, April 7, 2011
Roof Update
 |
| The South face is finished! |
Metal roofs can be ordered painted or have a galvalum finish, which is slightly cheaper but doesn't weather quite as well, and can be blinding when the sun hits it just so. We didn't want to have motorists cursing us every day around 10am when our roof will reflect sunlight up Chestnut Street. So we considered a very striking white, and were sort of enthralled for a day or two with the idea of a brilliant white roof, but ultimately went for a less bold but very handsome light gray color.
 |
| Our custom fabricated gutter outlet, made from scraps left over from the rake flashing |
 |
| Moving the next panel into position |
 |
| I work the folded bottom edge onto a cleat while Chris tugs and jiggles the panel in a helpful manner |
 |
| Trinity and Major Tom enjoying a Sunday morning snooze on the sleeping porch |
Subscribe to:
Posts (Atom)